For those who have seen the Earth from space…
Actually, Space Ipsum text has a place in this article. Because for those who have seen the world through the assistance of an artificial global intelligence, you have a whole different perspective.
Kind of reminds me of that joke about perspective:
Next time you're feeling down, remember life is all about perspective: I have a friend who has sex 2-3 times a day, exercises twice a day,
reads two books a week yet every day he complains about how much he
hates prison.
TL;DR
YES!
Finally updated (just finished updating) my DNS settings. That was such a mess until I "figured it out," but GPT-4 made it so easy
Spoiler alert.
Used GPT-4 using the Playground. Here was the chat.
System message = "instruction": "You are a DNS expert. You know everything there is to know about troubleshooting DNS connections."
It took TWO MESSAGES! TWO FUCKING MESSAGES! Granted, I've also gotten but understanding the response compared to the AWS, human-generated documentation, and Google-search-result tutorials, it's like night and day. GPT told me exactly what I needed to do given the information I gave it.
[
  {
    "createdAt": 1683326981396,
    "completionMode": "chat",
    "prompt": "Since you're using CloudFront with an S3 bucket, you'll need to update your CloudFront distribution to use the new SSL/TLS certificate. Here are the steps to do so:\n\n1. After renewing the certificate in AWS Certificate Manager (ACM), as mentioned in the previous steps, go to the AWS Management Console.\n\n2. Navigate to the CloudFront service.\n\n3. Locate the CloudFront distribution associated with your subdomain (michael.smolkin.org) in the list of distributions.\n\n4. Click on the distribution ID to open the distribution settings.\n\n5. Click on the "Edit" button in the "General" tab.\n\n6. In the "SSL Certificate" section, select "Custom SSL Certificate" and choose the new certificate you just renewed in ACM from the drop-down list.\n\n7. Scroll down and click on the "Yes, Edit" button to save your changes.\n\n8. The updated certificate settings will be propagated to all CloudFront edge locations. This process may take up to 15-30 minutes to complete. Once the propagation is finished, the new certificate should be used for HTTPS connections to your subdomain.\n\nTo ensure that your new certificate is working correctly, you can use an SSL checker tool like SSL Labs' SSL Server Test",
    "suffix": null,
    "instruction": "You are a DNS expert. You know everything there is to know about troubleshooting DNS connections.",
    "completion": "",
    "stopSequence": [],
    "startSequence": "",
    "restartSequence": "",
    "model": "gpt-4",
    "responseLength": 256,
    "temperature": 0.7,
    "topP": 1,
    "frequencyPenalty": 0,
    "presencePenalty": 0,
    "bestOf": 1
  },
  {
    "createdAt": 1683326871516,
    "completionMode": "chat",
    "prompt": "The errors you're encountering in both Google Chrome and Firefox indicate that the SSL/TLS certificate for your subdomain (michael.smolkin.org) has expired. In order to resolve this issue, you will need to renew the SSL/TLS certificate and install the updated certificate on your server. Since the certificate was originally issued by Amazon's AWS private certificate authority, you'll need to follow these steps:\n\n1. Log in to your AWS Management Console.\n\n2. Navigate to the AWS Certificate Manager (ACM) service.\n\n3. Locate the expired certificate for your subdomain (michael.smolkin.org) in the list of certificates.\n\n4. Select the expired certificate and click the "Renew" button. AWS ACM will attempt to automatically validate the domain and issue a new certificate. If manual validation is required, follow the instructions provided to complete the domain validation process.\n\n5. Once the new certificate has been issued, you'll need to update your server to use the new certificate. This step will vary depending on your server setup:\n\n   a. If you're using an Amazon EC2 instance, you'll need to update your web server configuration (e.g., Apache, Nginx) to use the new certificate and private key files, and then restart the web",
    "suffix": null,
    "instruction": "You are a DNS expert. You know everything there is to know about troubleshooting DNS connections.",
    "completion": "",
    "stopSequence": [],
    "startSequence": "",
    "restartSequence": "",
    "model": "gpt-4",
    "responseLength": 256,
    "temperature": 0.7,
    "topP": 1,
    "frequencyPenalty": 0,
    "presencePenalty": 0,
    "bestOf": 1
  }
]
I didn't bother changing the temperature, since I was just testing the system. If needed, I would've lowered the temp until it gave me a more concrete answer to make it easier to read. The only suggestion I would give to make it better:
I found out that I hadn't actually regenerated my ACM SSL key, even though I thought I had, and the root server (www.smolkin.org) was working and serving requests flawlessly.
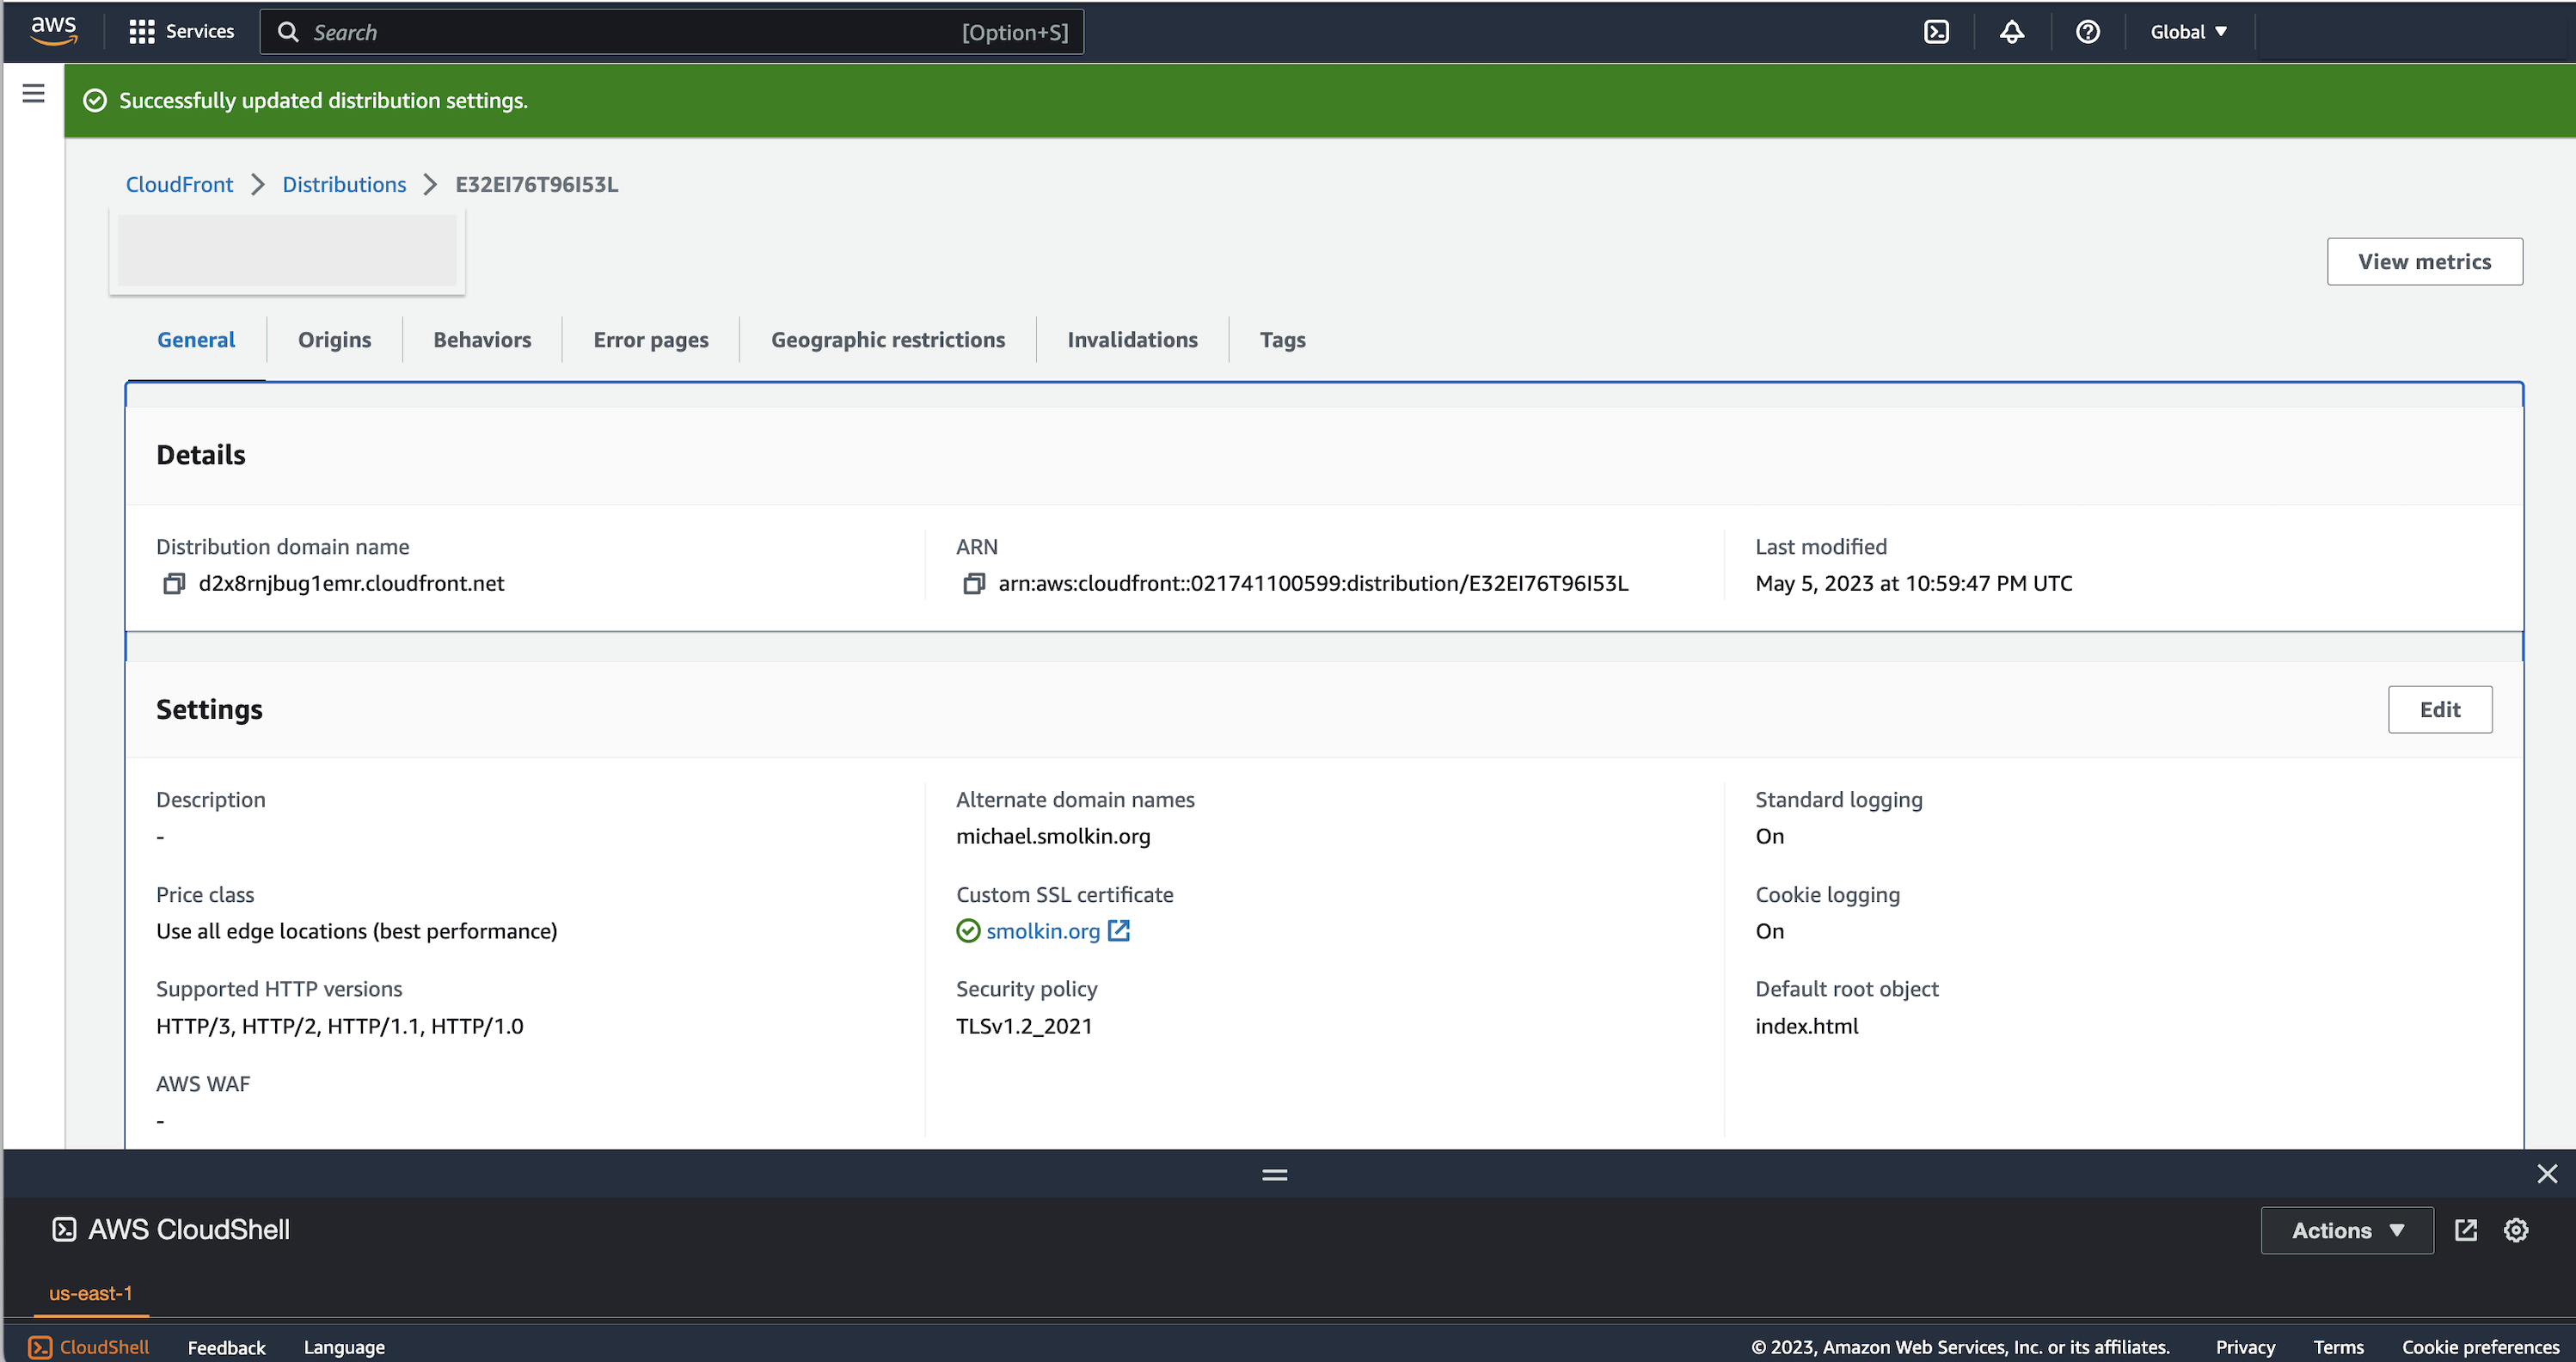
Click on the "Edit" button in the "General" tab.
This should actually say
Click on the "Edit" button at the right of the "Settings" flexbox in "General" tab.
It knew exactly what to filter out and ignore (e.g. the MX servers and the domain name used for it). It knew exactly how to fix my problem. Impressive.
And, most importantly, helpful.
Side note:
Posting this blog article still took me 59 minutes, even with Markdown->HTML assistance.
Enjoyed this post?
Get notified when I publish something new. No spam, unsubscribe anytime.